May 30, 2011

Nora's Nursery - DIY Custom Mural


I LOVE my daughter's nursery. It turned out exactly as I had planned {which never, ever, ever happens in my life}. It is warm and cozy, shabby chic and a little tropical {think, Bob Marley's Three Little Birds}. Just perfect!

I used Waverly's Small Talk Blackbird Fabric for the base of the nursery design. The design contains birds, leaves and trees and the core colors in the fabric were black, white, gold and grey. Not too girly, kind-of tropical... perfect for my style.

DIY Custom Mural {for non-artistic people like myself}

Step One: Locate Design

I knew I wanted a mural on the wall, but drawing is not a skill I possess. So, I faked it. Using the fabric as a guide, I found a tree design I liked on the web, printed it and traced it onto a clear sheet protecter. 

Step Two: Trace on Wall

On a borrowed overhead projector, I traced the tree outline onto the wall. A laptop and LCD projector would have worked even better because you could skip the whole "trace it onto a clear sheet" part!

Step Three: Create Templates for Small Details

Once I had the tree drawn, I created templates of the leaves, birds and flowers. I simply placed freezer paper over the fabric and traced the items. Then, I traced the template onto a heavier card stock. I randomly placed the templates on the tree and traced them onto the wall. I made some mistakes...okay...lots of mistakes. Thankfully, pencils come with erasers.

Step Four: Paint

Once everything was drawn, paint your mural {don't be scared, it's just paint}. For this mural, I used acrylic paint in white, black and gold. I mixed the white and black to get my grey. I bought 4 ounce bottles of each color and had plenty left over! 

I found it much easier to get the tree and branches painted first, then the leaves, then the birds.  


Step Five: Admire

Step back and admire the mural!  


Because I was 7 months pregnant and still suffering from "morning sickness", this project took me about six weeks.  However, it could EASILY be completed in a weekend by a non-puking person.

May 19, 2011

Grow with Me Handprint Art


Before Sweetpea was born I had all these fanciful ideas of preserving her every breathing moment. After she was born, reality hit and my “free time” to craft was rededicated to catching up on sleep or laundry {and maybe a few mindless hours playing Words with Friends). Needless to say, while I have taken tons of pictures and videos of her from day one, I have not spent much time crafting a keepsake… until two months ago.

Two months ago, I FINALLY created her “Grow with Me Handprint Art”.  I really wanted to start this with her newborn handprint, but alas…it didn’t happen, so I started with her 4 month old handprint instead {sigh}. Each year, on her birthday {give or take 4 months}, I plan to retrace her hand over the previous year's handprint - creating a piece of art from her growing hand.


Tools: 

8 x 10 Canvas Panel, Tissue Paper, Mod Podge, Acrylic Paint, 8 x 10 Frame (not pictured), Scrapbooking letters (not pictured), paint brushes and the cutest, little, pudgiest hand ever (not pictured)

Step One:

I am not a fan of untextured canvas. It just irks me. It is a personal thing and I wouldn't hold it against anyone if they chose to skip this step. But for me, I took a piece of tissue paper and balled it up several times. Once I got to my desired texture, I pasted the tissue paper on the canvas using Mod Podge.


Step Two:

After your tissue paper thoroughly dries, paint the canvas with your desired color. I went with beige {because I am boring like that}. 

Step Three:

After the paint dries, trace your darling baby's hand in the center of the canvas. Now, if you can actually do this, kudos to you!!  I couldn't. Her wiggly hand just wouldn't bend that way, nor would it stay in one spot long enough for me to trace it. Sooo, step 3b, called for tracing her hand onto copy paper while she was sleeping! That worked!


Step Four:

Trace the handprint on your painted canvas with pencil, then trace that outline with a paint pen. Be sure to add the age of your child at the time of the tracing.


Step Five:

Using Scrapbooking letters, spell out your child's name at the top of the canvas, then frame and display!


I wonder how much larger her hand will look in six more months when I trace it again!?! Ohhhh.....it makes me cry just thinking about it!!!

May 15, 2011

Chocolate Covered Cookie Dough Balls

Warning! The blog post was written after I consumed large amounts of chocolate and cookie dough…. LARGE FREAKING AMOUNTS! Although I may never again fall asleep, {which is actually perfect since I have a teething 6 month old who has shucked the notion of sleeping} the chocolate covered cookie dough balls were FANTASTIC!

Cookies and Cups, a wonderful blog that I am COMPLETELY obsessed with, inspired the chocolate covered cookie dough balls. I set out to make her Cookie Dough Stuffed Brownie Truffles and FAILED {its okay...I am accustom to failures while baking}. My problem was that I made the cookie dough balls too large, so once covered in brownies, my “little” truffles were the size of pool balls…. a little too gluttonous, even for myself.  So, I ditched the brownies {by ditch, I mean ate them from the pan with a spoon} and just dipped the cookie dough into the melted chocolate. Can't go wrong with that!

Oh, I just wanted to mention that the egg-free cookie dough tasted exactly like the real thing....SINFULLY delicious. 

Here are the Chocolate Covered Cookie Dough balls....


My balls, just chillin' with the Blue Bell ice cream.


Plop! {look at the chocolate trails... I am SO MESSY when I play with melted chocolate!}


Roll it!


Let the excess drip off.


Dry? Cool? Harden?  Whatever.....you get the point.


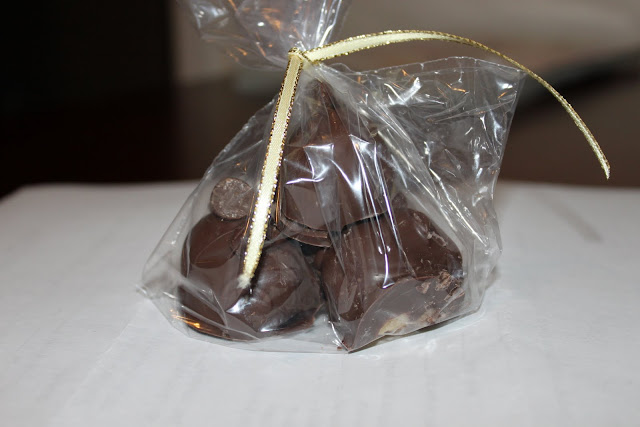
Place three balls in a small plastic bag and PROMPTLY give away before you eat them all!